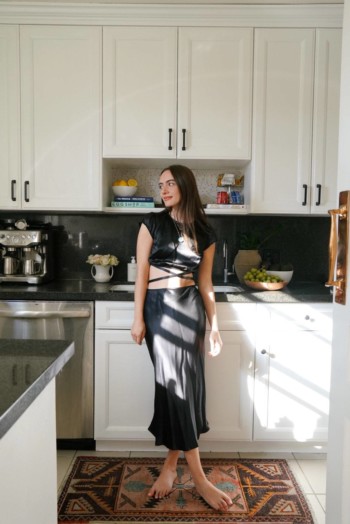
With limited knowledge and a lockdown-induced craving for change, podcaster Olivia Perez digs into DIY in her Los Angeles kitchen
By Gabriela Ulloa March 3, 2021
“It was totally quarantine induced,” says Olivia Perez, the journalist and podcast host, about her lockdown renovation project. Don’t get us wrong: We love a full-blown countertops-to-appliances-to-backsplash makeover, but there’s truly nothing like the magic of a tiny tweak that leaves a not-so-tiny impact. Cue Olivia’s reno project: adding a bright coat of paint and switching up the hardware of her already existing kitchen cabinets. Equipped with YouTube-fueled knowledge, the support of her partner (and roommate), as well as her friend Maude Etkin, who just so happens to be an interior designer, Olivia and her “accountability buddies” were ready to go.
After being fed endless Instagram posts featuring savvy home renos, Olivia gathered up the courage to take the DIY plunge. “I have no design style at all,” she jokes. “I’m not great with it but I love the idea of being able to do things yourself.” And with so many quarantine projects, time was on Olivia’s side when it came to embarking on this renovation. “I’m a big believer about living in a space for a while before you do anything. Try it, buy it, you can always return it. So we definitely took our time with it.”
Location: Los Angeles
The before: Yellow-toned cabinets with silver surrounded the black countertops, which gave off a dated look.
The inspiration: “I love barn-style kitchens, so I put together a few mood boards and watched a bunch of different YouTube videos. I’ve always loved white kitchens, even though I recently read an article saying that they’re ‘over,’ but I don’t care,” Olivia quips. “I grew up with an airy kitchen where I spent 90% of my time. So many memories are made in the kitchen, so having a bright space was really important to me.”
Main Ingredients
Materials:
- Sanding sheets
- 2 gallons of paint
- A painter’s set including a paint tray, paint rolls, painter’s tape
- 2 tarps
- The hardware
Steps:
- Draw a map of your kitchen.
- Remove the cabinets from their hinges and label them accordingly so you can keep the screws and hardware together.
- Take the cabinets outside and sand them down. Be sure to cover all surrounding furniture and to do the sanding over a tarp.
- Tarp the inside of the kitchen and sand away!
- Paint away! Depending on your cabinets, you might need a primer, as Olivia’s did. Also, double-check how much paint you'll actually need. In her case, it took one coat of paint on the back, two coats on the front, and one on the side. Pro tip: Paint the back of the cabinets first as to not get fingerprints on the front, and don’t over-paint the sides. They’ll get too thick and won’t fit back in their original spot!
- Paint the inside of the kitchen.
- Put the cabinets back on and attach the appropriate hardware. If you're looking to keep your project extra simple, stick to the type of hardware the cabinet came with—i.e., don’t drill an additional hole because you prefer a pull to a knob.
The hardest part: The sanding. “There was totally a moment where my boyfriend was like, ‘Um, should someone come help us?’ It was right before we had to start sanding the walls of the kitchen and we knew the cleanup was going to be a nightmare,” she reveals of their last-minute panic. Her tip? Know exactly what kind of sanding needs to be done for your specific cabinets. After making the initial mistake of overdoing it by opting for an electric sander, Olivia decided to embrace the kinks. “Now I smile every time I see them.”
The best part: “Realizing that your mistakes tell the best story when it comes to DIY,” Olivia shares. “Whatever you’re making, it’s going to have character. For me, knowing that was really cathartic, and that’s really what DIY is about.”
Her advice: Label everything. According to Olivia, Maude saved the day: “She came in and drew a huge map of the kitchen.” The duo then proceeded to place all of the hardware, screws, and bolts into individual bags that correlated to the cabinets labeled on the map. “It was crucial because by the time we went back to put the cabinets back on we would've been so confused and lost.”
Final bill: $350
Article By: Architectural Digest