In the Mountains our humidity level is very low. As we go into the winter months the moisture levels in our homes drops further due to the cold weather outside and the furnace coming on frequently. This can cause your wooden furniture to start to creak when you sit on it. Your wood floors may show a little larger crack between slats but don't worry they will swell again in the spring.
For other furniture such as wooden chairs, as the wood glue dries and the wood itself shrinks a bit, causing the joints and dowels to loosen making the creaky noise. Here are a few easy tricks to help the situation.
Use Wood Swelling Solution
Step 1 - Inspect the joints in the chair to ensure the dowels that run into the leg or back of the chair are secured tightly. You can apply pressure on the outside of the leg or chair back to press them tightly into the dowel. Once you find a joint that seems to be causing the squeaking, move on to Step 2.
Step 2 - Apply a wood-swelling solution all the way around the dowel that is causing the squeak. There are many different types of wood-swelling products, such as Chairlock (available at Home Hardware) that will work.
Step 3 - Allow the wood-swelling solution seep into the hole where it will tighten and harden the dowel and secure it tightly.
Step 4 - Allow the solution to dry completely before sitting in the chair. The drying and swelling process should take no longer than an hour.
Insert Dowels
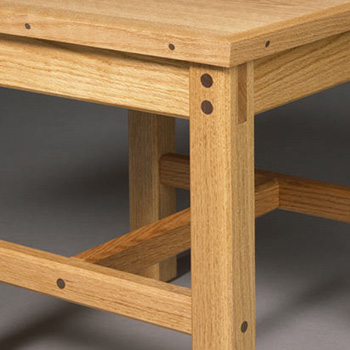
If you are handy and want to take a different approach further you can always insert wooden pegs across creaking joint or tenon of the of the chair.
Step 1 - Sit in the chair to make it squeak. Rock back and forth, up and down until you have a good idea where the loose parts are. Get up and grab the offending pieces with your hands. Pull and tug on the parts of the chair until you have located the loose dowels or tenons.
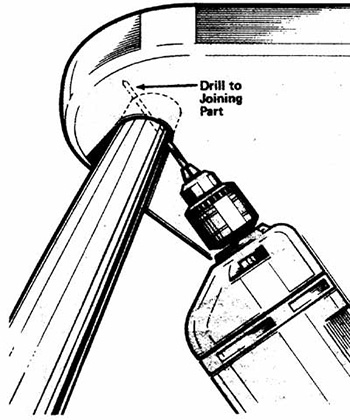
Step 2 - Insert a 1/4-inch bit into a cordless drill. Place the tip of the drill bit at the intersection where you located the loose dowel. Drill through the intersection, angling the bit as needed to penetrate through the center of the intersection and out through the other side. You need to drill through as much of the dowel or tenon as possible. You may only be able to drill through one side. That's OK. Just drill through anywhere you can. If you can't drill through the joint, drill into it up to 3 inches deep and stop.
Step 3 - Squirt the hole full of glue. Pound a dowel all the way through the hole until it protrudes out the hole equally on both sides. If the hole doesn't go all the way through, just pound the dowel in as far as you can. Wipe the excessive glue off with a wet cloth. Place a clamp anywhere on the chair across the joint and tighten to get pressure on the joint. If you can't get a clamp on it, stretch masking tape around it as tight as possible. Wait 24 hours for the glue to dry.
Step 4 - Remove the clamps and tape. Cut the ends off the dowel with a small coping saw. Use a small file to file the dowel off flush and smooth with the joint. Sand the end of the dowel with 180-grit sandpaper. Use a stain marker to color the end of the dowel.
Note: Check the stability of older chairs. If joints are broken, pieces are split or if it has multiple defects, cracks or pieces that are missing, you may need to have the chair refurbished by a professional.


